Settings, Notifications, and User Information
The upper right portion of the display contains the EveKit toolbar:
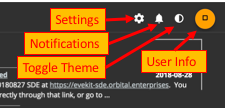
The toolbar has four elements:
- settings: common settings shared across all synchronized accounts.
- notifications: notifications about various account activities.
- theme: a toggle to switch between light and dark themes.
- user information: information about the logged in user.
Clicking on the settings button will display the settings dialog:
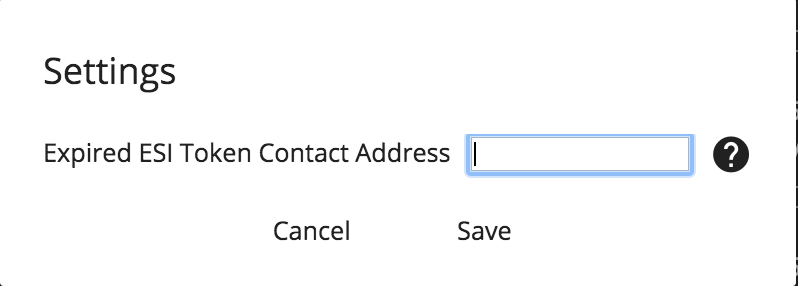
This dialog will display various options which allow you to customize EveKit according to your needs. At time of writing, the only setting is “Expired ESI Token Contact Address” which allows you to set an e-mail address which is alerted if one of your ESI tokens can not be refreshed.
Clicking on the notifications button will display the notifications dialog:
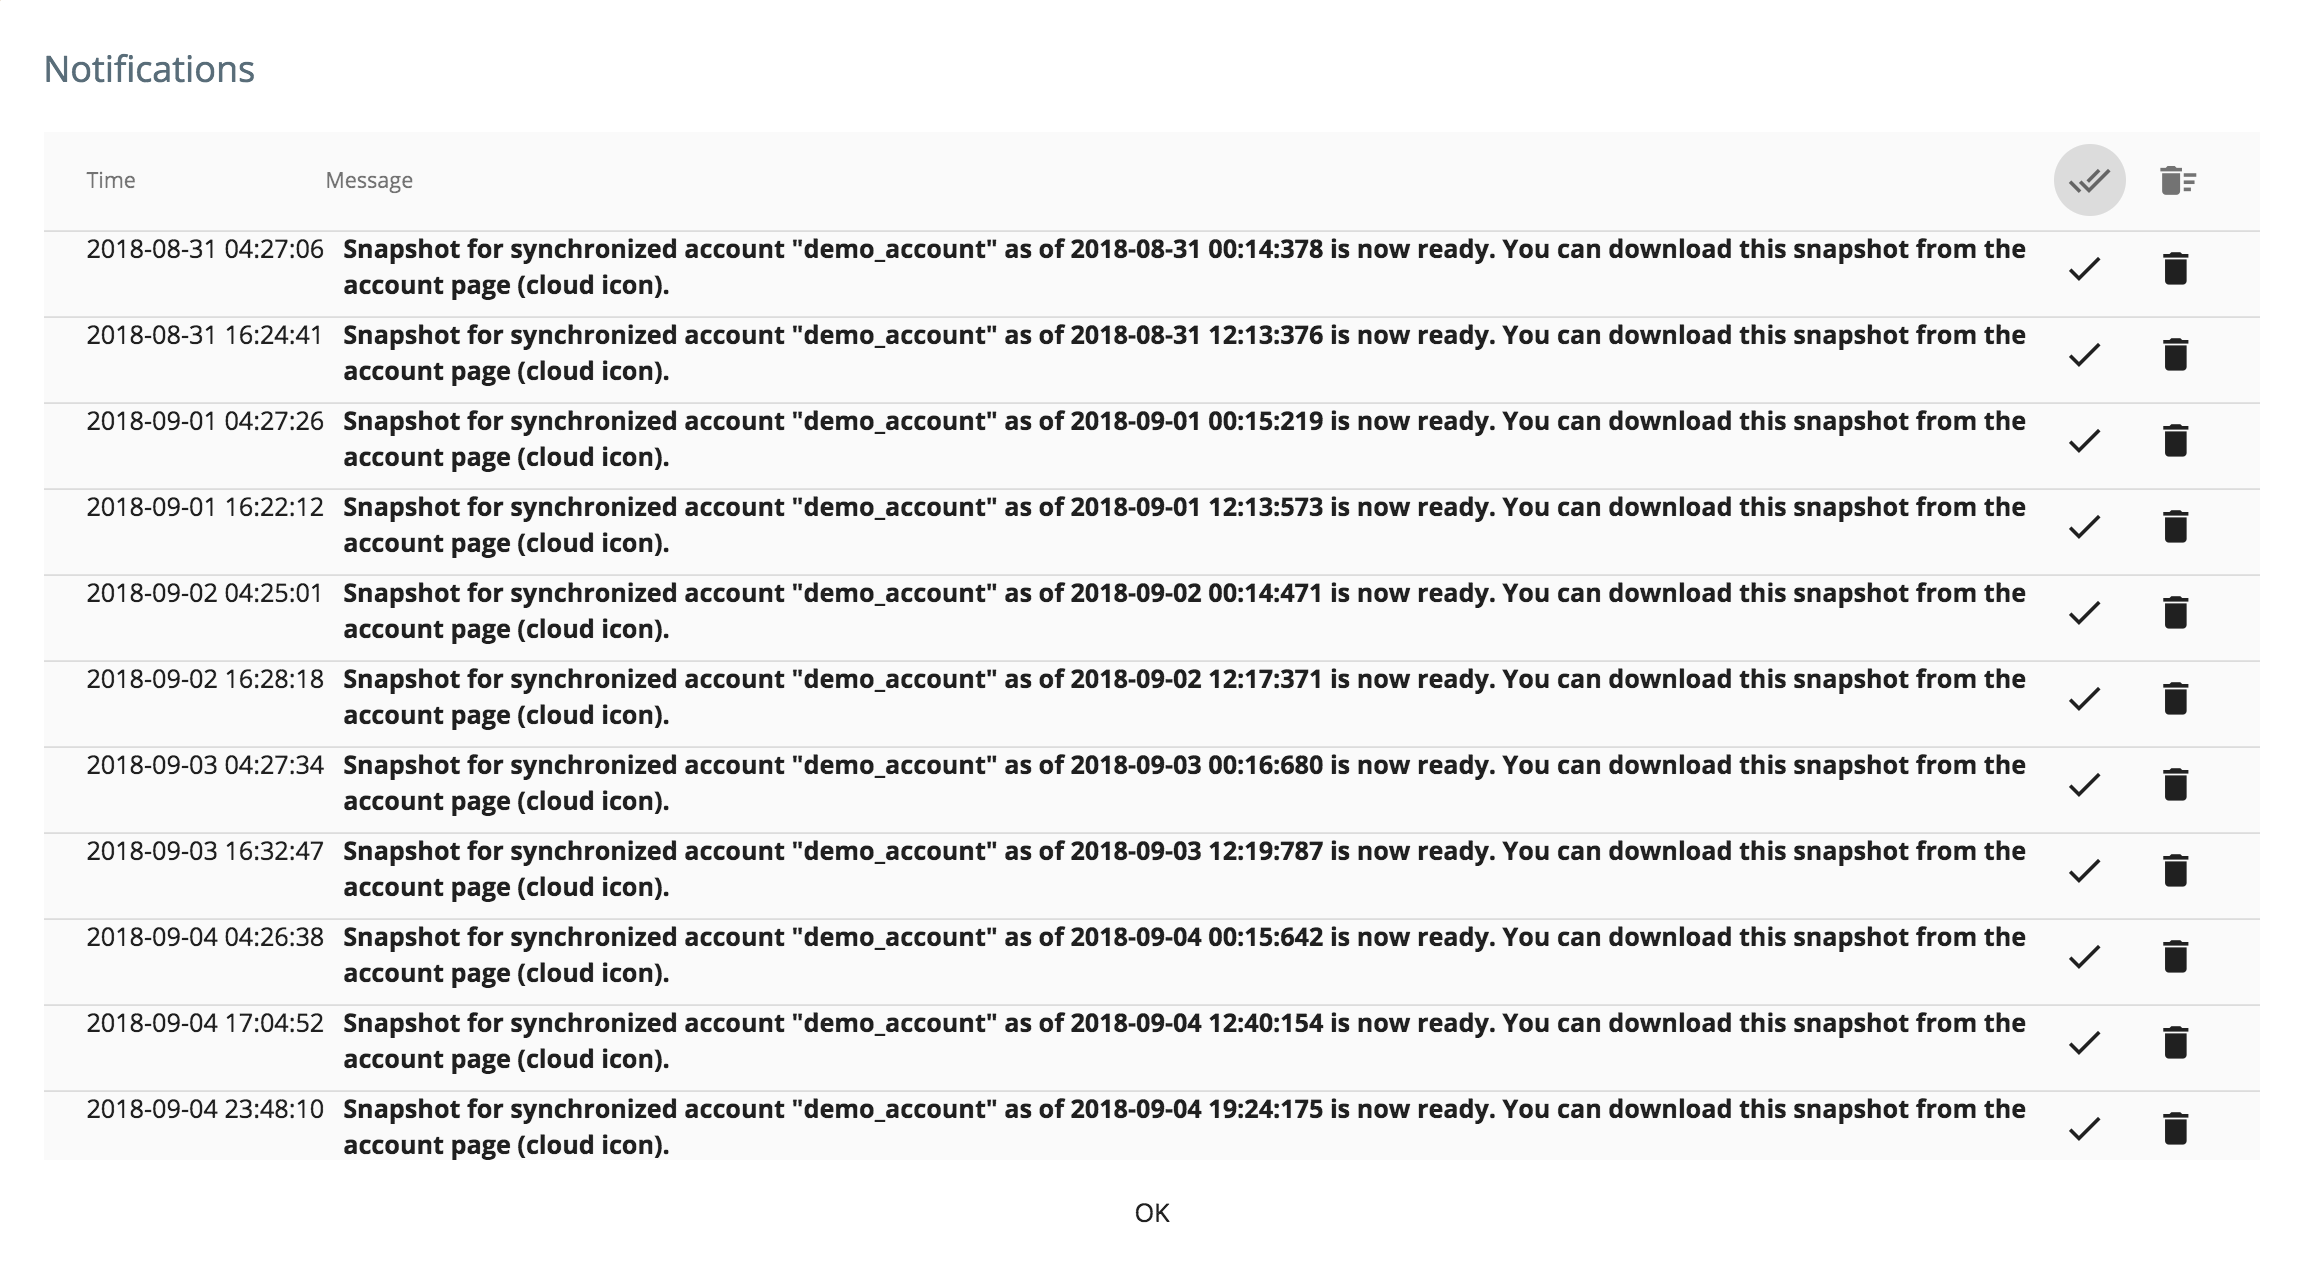
Notifications are typically informational events about one or more of your synchronized accounts. At time of writing, a notification is generated each time an account snapshot is generated (normally once a day). Unread notifications will cause the notifications button to be decorated with a different color and the count of unread notifications. You can read and/or delete notifications at your convenience. Note, however, that notifications are automatically deleted after 30 days (read or otherwise).
Clicking on the theme button will toggle between light and dark themes. Theme preferences are saved in a cookie on your browser so that they are preserved between sessions.
Finally, clicking the user information button will display the user info dialog:
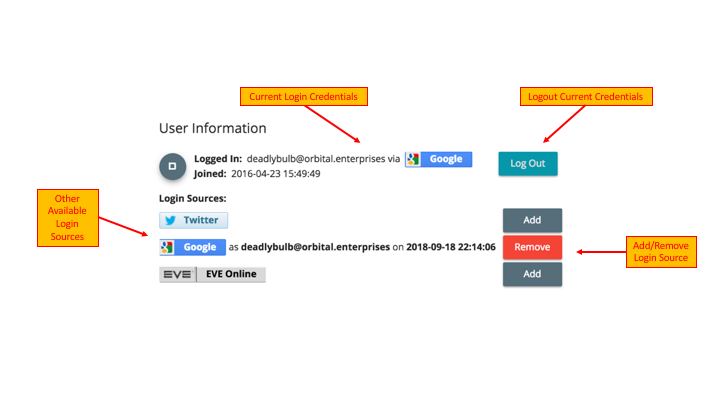
The user information dialog shows the credentials used for the current login along with the date when this user joined EveKit. Next to the current credentials is the “logout” button which will immediately logout the current user.
EveKit supports multiple login sources although, typically, users will only use one source at a time. If you need to use multiple sources or, more commonly, you have accidentally used multiple sources, then the user information dialog will let you manage your login sources as follows:
If you wish to use multiple sources… login with your prefered source and pull up the user information dialog. In the “login sources” section, click the “add” button of the additional source you would like to use. This will immediately start the authentication process for the chosen source. When this process completes, you will be logged in with the new source and all your sources will be tied together. You can once again pull up the user information dialog to verify all of your desired sources have been added.
If you accidentially logged in with a different source… you can always just logout and log back in with your preferred source. However, if you’d like to combine your sources (or remove the other source you used), then:
- Login with your preferred source.
- Pull up the user information dialog.
- In the “login sources” section, click the “add” button on the other source you used previously.
This will immediately start the authentication process for the added source. When this process completes, you will be logged in with the new source and all your sources will be tied together (which you can verify by pulling up the user information dialog). If you wish, you can now remove any sources you don’t want as described below.
If you wish to delete a source… login with any source you have used before and pull up the user information dialog. In the “login sources” section, click the “remove” button of the source you would like to remove. The selected source will be immediately removed. If the selected source happens to be your current login source, then you will also be logged out. If you only have one login source, then the UI will normally try to prevent you from removing your only source. If you manage to somehow remove your only source, you will need to contact the administrator to restore access to your account.